Creating Amazon S3 (Simple Storage Service) storage from scratch
Start with creating Amazon Web Services account
If you have decided to use Amazon S3 as your storage for Telestream Cloud services, you should first create an account with Amazon Web Services if you don’t have one already. Go to https://portal.aws.amazon.com/billing/signup#/start and fill in the registration form.
Once you’re logged in to the AWS Management Console go to https://aws.amazon.com/s3/ and choose Get started with Amazon S3 and follow the on-screen instructions. You will be notified via email when your account is active and available for you to use it. Don’t worry, you will not be charged for Amazon S3 until you actually start using it.
Creating bucket manually in AWS Management Console
Amazon S3 as most of the cloud storage services store your data, your files in general, as objects within buckets that are like folders. You can create the bucket by yourself in your S3 console. How to do it?
Follow the instructions, step by step:
- Open the Amazon S3 console at https://console.aws.amazon.com/s3/
- Click the button Create bucket
- Choose the name of your bucket in the Bucket name field. Remember that it must be DNS-compliant. Follow the naming guidelines:
- The name must be unique across all existing bucket names in Amazon S3.
- You cannot change the name after the bucket is created.
- Choose a bucket name that reflects the objects stored in the bucket.
- Remember that the bucket name is visible in the URL that points to the objects that you're going to put in your bucket.
- Choose your region, for example US West (Oregon). Remember that if you create bucket in a region where we’re unable to process your media
- Click the button Create.
Now your bucket in Amazon S3 is ready to use but first we need you to grant us access to it so we’re able to deliver files to it. Depending on how you define permissions in S3 you might be able to create buckets directly from our console when adding a store instead of manually in AWS, simply entering a name in an appropriate field.
When adding a store, you can pick one of two ways to grant access to a bucket - using either Role ARN or with Access Key and Secret Key pair.
Providing access to AWS bucket with ARN (Amazon Resource Name)
If you’re already familiar with AWS roles and use them on regular basis you may prefer using this method. In this case, we only need you to provide us with the Role ARN you wish to use with Telestream Cloud. This role can be later reused by you to grant us access to any AWS resources you would use with our services (e.g. to grant access to other S3 bucket or to set up notifications).
IAM Role is an AWS identity not associated with one user but assumable by anyone permitted and has defined policies that determine what it can and cannot do in AWS.
A Role ARN (Amazon Resource Name) can be found in AWS Management Console under Services > Security, Identity & Compliance > IAM > Roles in the navigation panel.
To create a Role from scratch login to your AWS console and go to Services > Security, Identity & Compliance > IAM > Roles and click Create Role.
In Create Role wizard select Another AWS account as a type of trusted entity. Please make sure that Require External ID checkbox is selected.
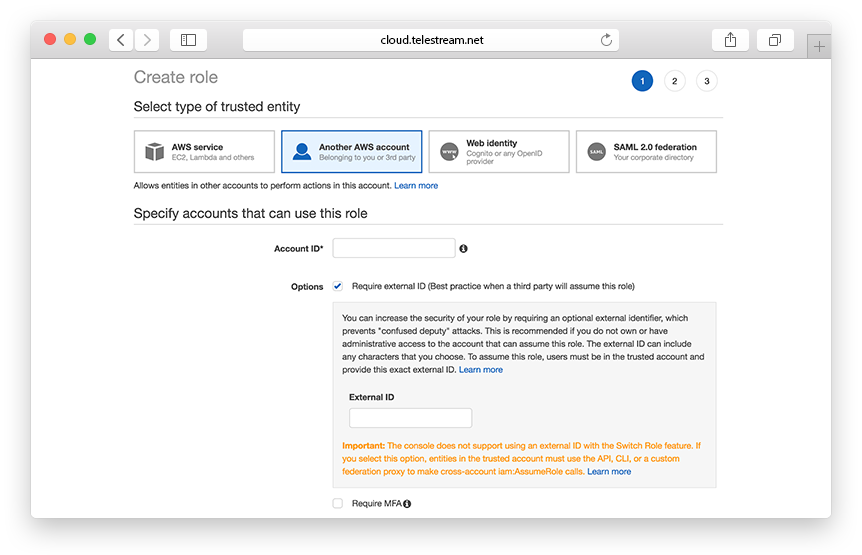
You will need our AWS Account ID and External ID provided in Telestream Cloud console when setting up S3 store to fill these required fields.
Next step is defining permission policies. You can either create a completely new policy or use one of the templates provided by AWS (Amazon S3 Full Access policy provides full access to all buckets). The role must at least have permissions to read and write to a specified bucket. Also, make sure you’re authorised to set the level of permissions assigned to the resource.
Sample S3 Policy
{
 “Version”: “2008-10-17",
 “Id”: “FlipBucketPolicy”,
 “Statement”: [
   {
     “Sid”: “Stmt1344015889221”,
     “Effect”: “Allow”,
     “Principal”: {
       “AWS”: “arn:aws:iam::078992246105:root”
     },
     “Action”: [
       “s3:AbortMultipartUpload”,
       “s3:GetObjectAcl”,
       “s3:DeleteObject”,
       “s3:GetObject”,
       “s3:PutObjectAcl”,
       “s3:ListMultipartUploadParts”,
       “s3:PutObject”
     ],
     “Resource”: “arn:aws:s3:::YOUR-BUCKET/*”
   },
   {
     “Sid”: “Stmt1344015889221",
     “Effect”: “Allow”,
     “Principal”: {
       “AWS”: “arn:aws:iam::078992246105:root”
     },
     “Action”: [
       “s3:GetBucketAcl”,
       “s3:ListBucket”,
       “s3:ListBucketMultipartUploads”,
       “s3:GetBucketLocation”,
       “s3:PutBucketAcl”
     ],
     “Resource”: “arn:aws:s3:::YOUR-BUCKET”
   }
 ]
}
When creating custom policy select S3 as a Service with Read and Write as Access level. Then specify S3 Resources this policy is for (bucket in this case).
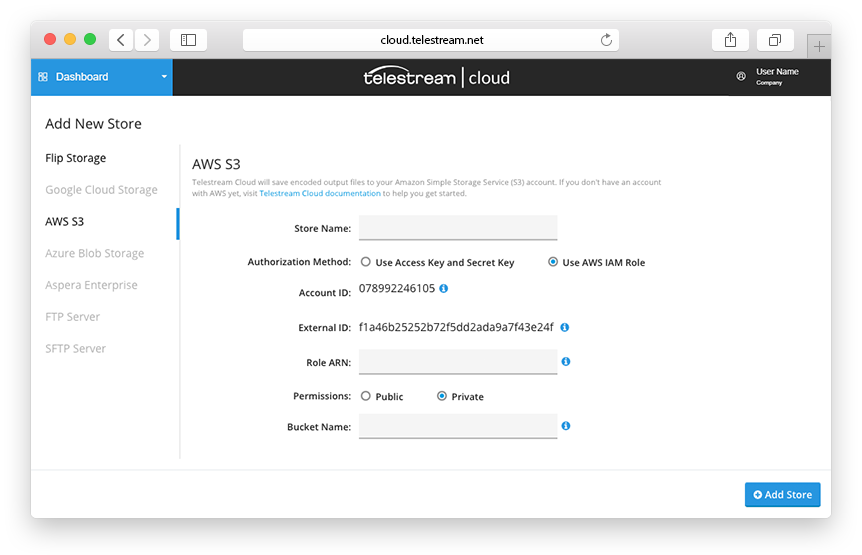
In the last step name the role (optionally with description) review the policies and that’s it. The created role will be visible in the roles list. To get its ARN simply click on the role. Paste the ARN into Telestream Cloud console to finish setting up S3 authentication with ARN.
Enabling access using Access Key and Secret Key
Here at first, you must create IAM user for Telestream Cloud in your AWS account. To do so, go to https://console.aws.amazon.com/iam/ and then in the navigation panel choose Users. Click on Add user. Type the username for a new user.
Remember that user names can be a combination of up to 64 letters, digits, and these characters: plus (+), equal (=), comma (,), period (.), at sign (@), and hyphen (-). Names must be unique within an account.
In the next step, you select a type of access. Click on Programmatic access and then choose Next: Permissions
In the section Set Permissions click on Attach existing policies to user directly Now you must choose one of the predefined policies to let Telestream Cloud in or create custom policy. We recommend choosing Amazon S3 Full Access from the list.
Once you created a new user, you need both Access Key and Secret Key to add your storage in Telestream console for authentication. Click Show next to each password. You can do it only once, so be sure that you’ve got your Telestream console open.
Fill in the appropriate fields, giving the store and the bucket names, entering Access Key and Secret Key for authentication (Remember that we do not store your credentials and need it only once when creating the role). If you type in the name of a bucket that doesn’t exist in S3 yet, we will create it for you, so you don’t always have to create buckets manually.
Click Add Store and it’s done