Create Google Cloud Storage (GCS) from scratch
Log in to your account on the Google Cloud Platform
If you use Google services in your company on a daily basis Google Cloud Storage might be your preferred place to store your Telestream Cloud outputs. If you don't have Google account yet but wish to use this vendor for cloud services, you will be prompted to create one at https://cloud.google.com/
Create a bucket for using Telestream Cloud
In Google Cloud Store all data (objects) belongs inside a project. Buckets are basic containers inside projects. So first you should create a project. A project consists of a set of users, a set of APIs, and billing, authentication, and monitoring settings for those APIs.
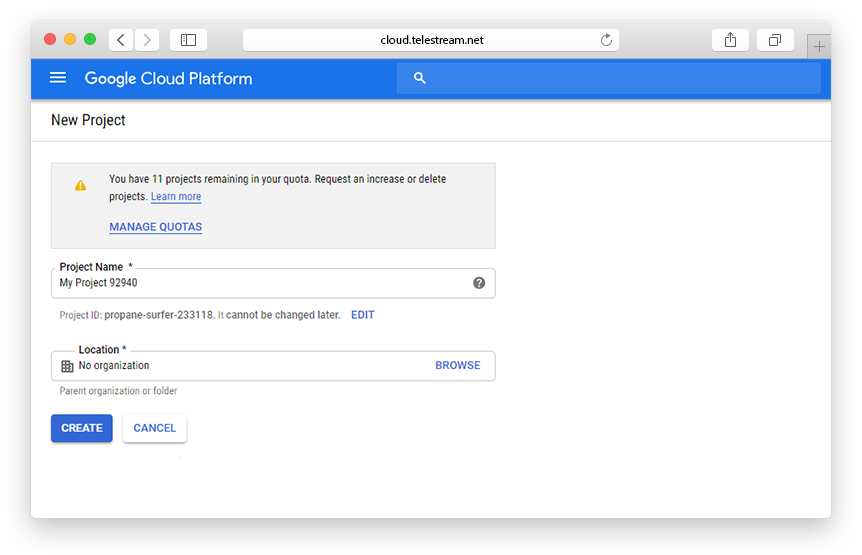
Go to https://console.cloud.google.com/projectcreate, log in and create a project for Telestream Cloud.
Enter the Project Name (Remember that you will not be able to change it later) and Location (parent organization or folder).

Once you've created the project, go to https://console.cloud.google.com/storage/browser to create a bucket for your Telestream Cloud data.
Follow the instructions, step by step:
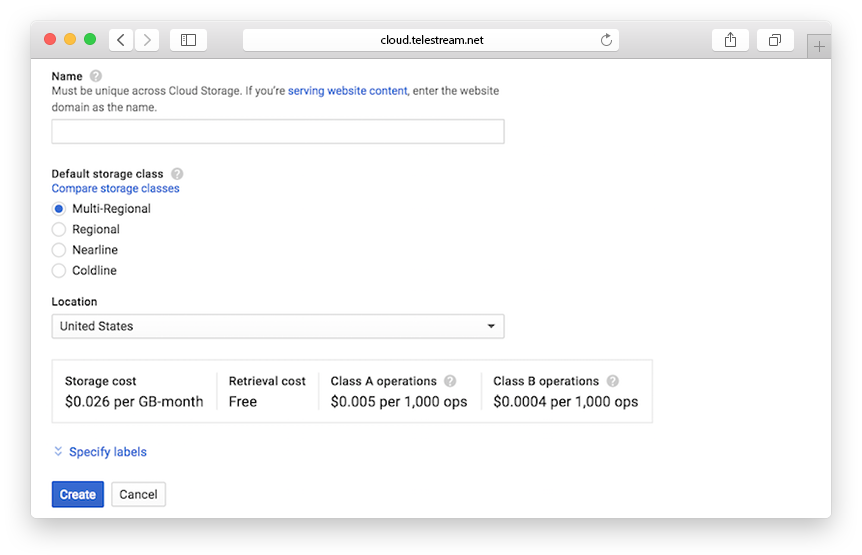
- Click Create bucket
- Specify a Name - bucket names have more restrictions than object names and must be globally unique, because every bucket resides in a single Cloud Storage namespace.
- Select a Default storage class for the bucket – there are costs associated with this choice, so it is worth considering which one to pick. You can click on Compare storage classes to see monthly cost estimates per storage class.
- Choose Location where the bucket data will be stored.

Click Create and you got it!
The next step is to add the created store in the TC console. You can do it in two ways. First, by providing Access Key and Secret Key when creating your store in the Telestream Cloud panel. The second way is to use Cloud Identity and Access Management (Cloud IAM) permissions.
Enabling your store for Telestream Cloud using Access Key and Secret Key
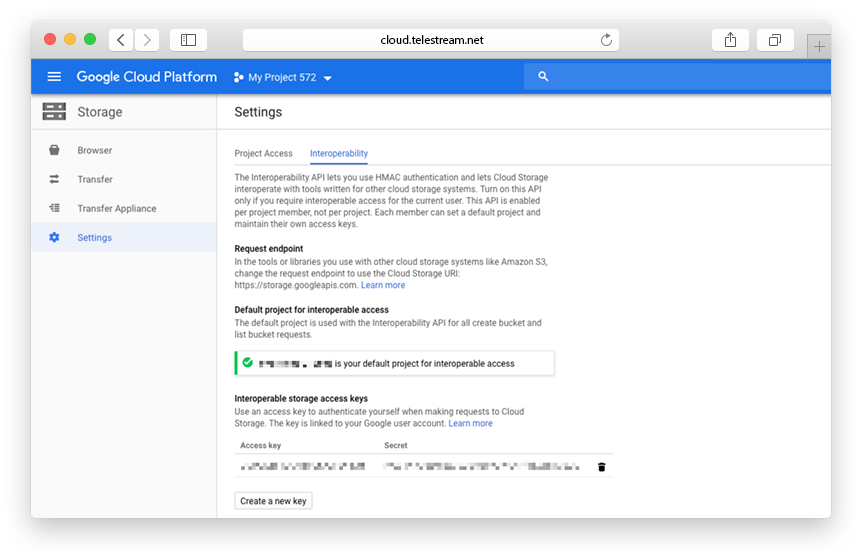
In the Google Cloud Platform service, these keys are called "interoperable keys" or "migration keys". To generate Access Key and Secret Key, you should go to your project’s storage page.
In the left sidebar of the dashboard, click Google Cloud Storage and then Settings. Select the Interoperability tab. If you haven't enabled it already, click on Interoperable Access.
Now you should see an empty list and a Create new Key button. Click the button to create an Access/Secret key pair.

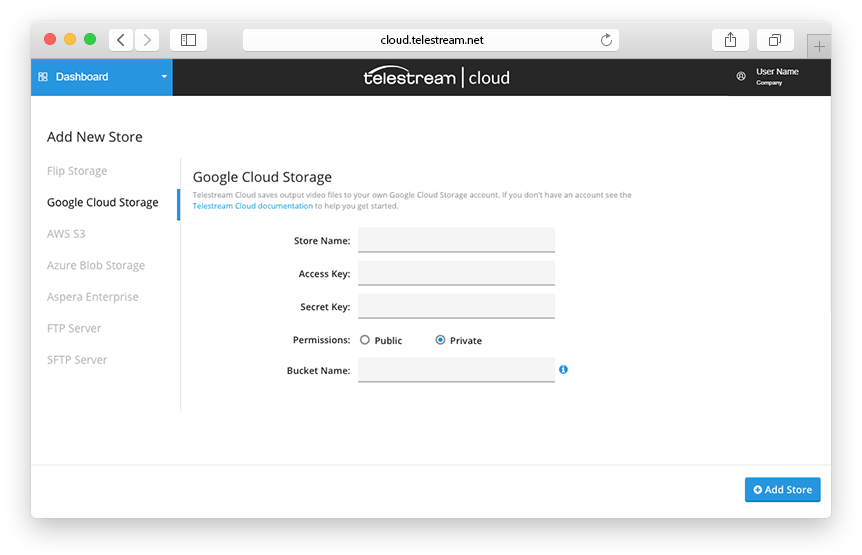
Now open your Telestream Cloud console to add your storage.

Fill in the appropriate fields, giving the store name and the bucket name, entering Access Key and Secret Key for authentication (Remember that we do not store your credentials and need it only once when creating the role). Click Add Store and you’re done.